SimpleRTApp: How to use Heroku Scheduler to run cron jobs
This article is the last one of many which explain how to obtain notifications in a iOS device based on the most relevant tweets for the user. More info about the project here
Now we’re going to create a job on Heroku, which will be called between some time we want and it will run the script to look for and notify the tweets to the users.
Requirements
We would need to have a Heroku account, with an uploaded application.
In our tutorial we’re goint to continue with the last part of the project SimpleRTApp.
What is Heroku Scheduler?
Heroku Scheduler is a plugin for a Heroku application. It simply allow us to define a command to be run in a desired time interval. It can be daily, by hour or in a 10 minutes window.
Configuration
To be able to add Heroku Scheduler to our app we’ll have to go to our Heroku dashboard. We go to “Resources” and on the add-ons section we look for “Heroku Scheduler”
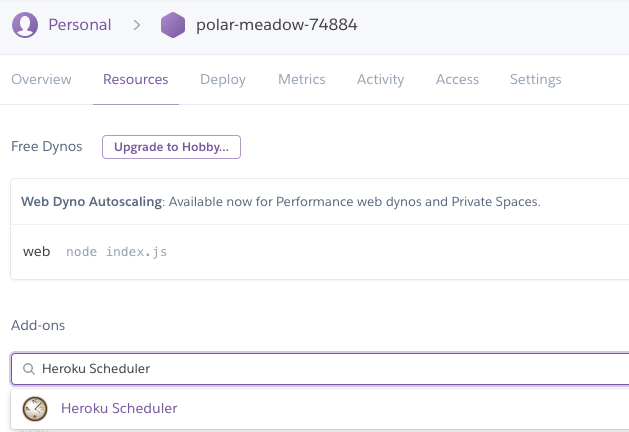
It’s possible that Heroku ask us to validate our account entering a credit card. If that’s the case, it won’t charge any amount, unless we choose a paid service plan there.
Once we added the plugin, we enter to its configuration. In our case, we want
it to run the command node send_tweets.js each hour. To do that, we add the
new job:
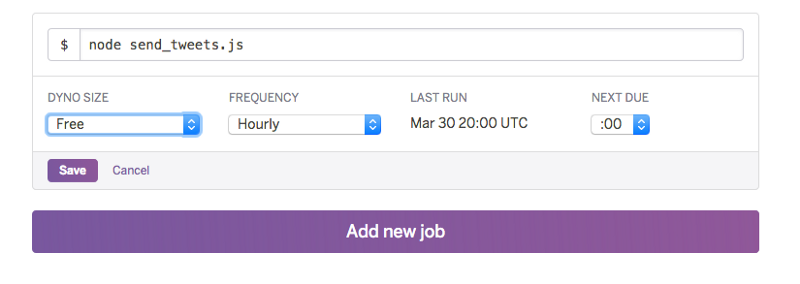
We complete all the required data and tap on “Save”. It’ll tell us when will be the next time the job will be run in the field “NEXT DUE”:
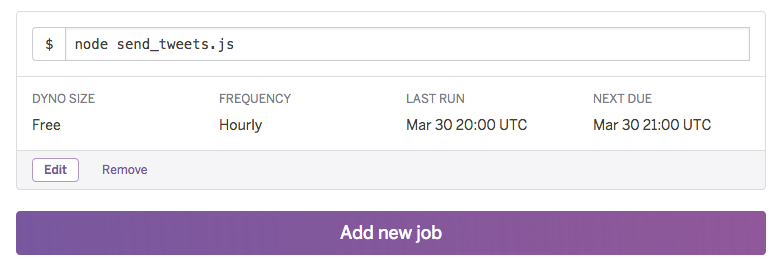
Done! It just a matter of wait to be the hour that the page indicate us.
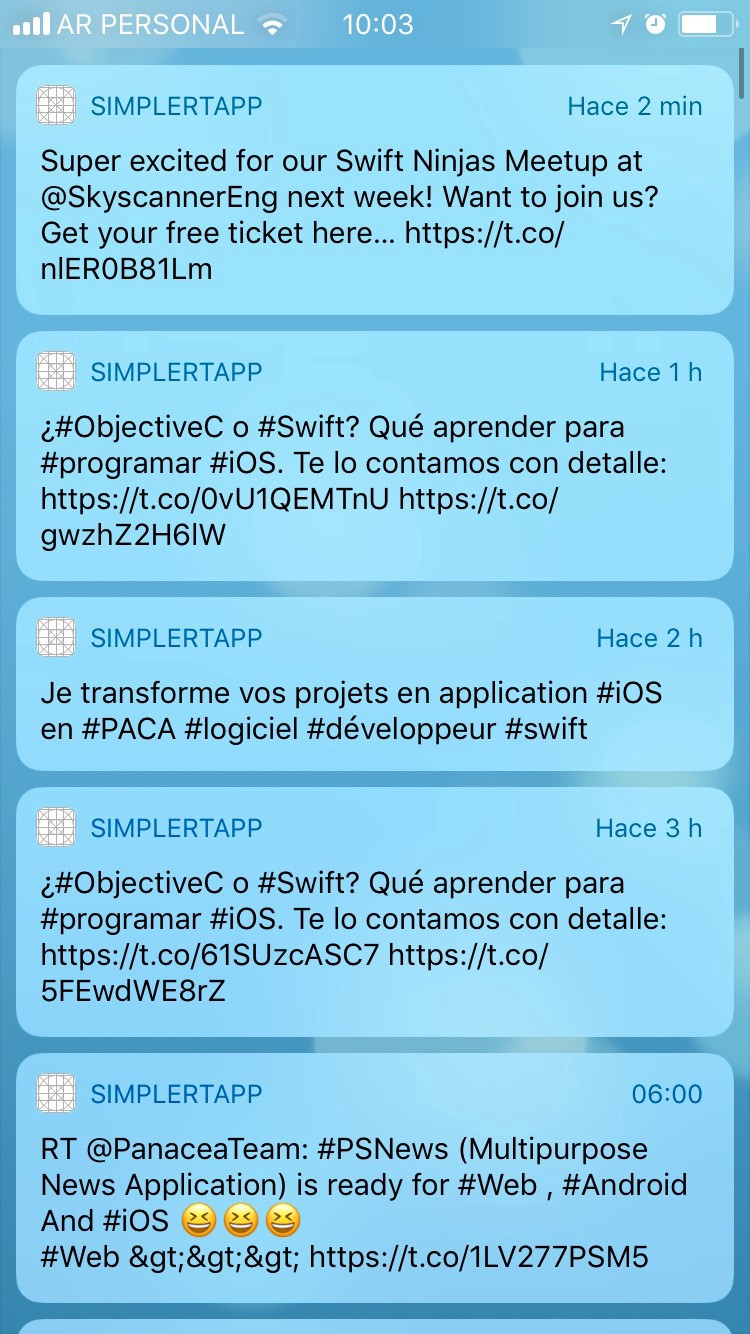
Like the dynos, we have the possibility to see the logs for the jobs. To do that, we go to “View logs”, on “More” menu, to the left on the Heroku dashboard.
We can see the result of the running cron in the next picture:
Conclusions
We saw how to create a cron on Heroku, simply adding a plugin like Heroku Scheduler. It just will ask us for the desired command and the frequency for that.
With all this we finished the post series about SimpleRTApp, a simple system which involves iOS development, a Node.js backend, the MySQL database configuration and the cloud service setup on Heroku.
Thanks a lot for reading!
Sources
This article is also available on Medium