SimpleRTApp: Deploying a Node.js app to Heroku
This post is part of a serie which aims how to obtain relevant tweets, based on hashtags, as notifications in a iOS app. You can see the main post here.
We’re going to see how to upload our app and local database to Heroku.
What is Heroku?
Heroku is a Cloud Service platform which allow us to deploy, run and manage Ruby, Node.js, Java, Python, Clojure, Scala, Go and PHP applications.
Dynos are fundamental pieces of Heroku architecture model, they provide computing processing on the platform. They are based on Linux Containers.
Each Dyno is isolated of the rest, so the commands which we run and the files that are stored there don’t affect other dynos. Also they run on the required environment for the applications to be run.
How to create an app on Heroku
To be able to start to work with Heroku we can create a new account here. We do all the new account process, validate our email and login again in the page.
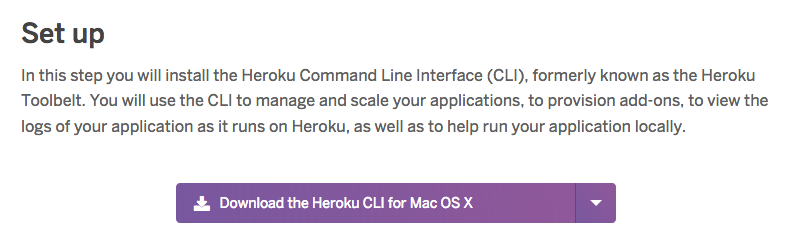
We have to download the Heroku client which will allow us to upload and setup our application from terminal. Here we can download the client.
Once we have the client installed, we open the terminal and run the command
heroku login, which will ask us for our credentials.
With all the setup done for the client, we go to the folder of our project
SimpleRTAppApi and run heroku create. This will give us the following
output:
MacBook-Pro-de-Federico-Jordan:SimpleRTAppAPI federicojordan$ heroku create
Creating app… done, ⬢ polar-meadow-74884
https://polar-meadow-74884.herokuapp.com/ | <https://git.heroku.com/polar-meadow-74884.git>
Now we created the app on Heroku, which will have an linked git repository with our local changes. By this way if we want to deploy any change to the Heroku app, we simply would have to do a push to this branch.
Heroku will create the app with a random name, in this case it will be polar-
meadow-74884, we can rename it later in the dashboard.
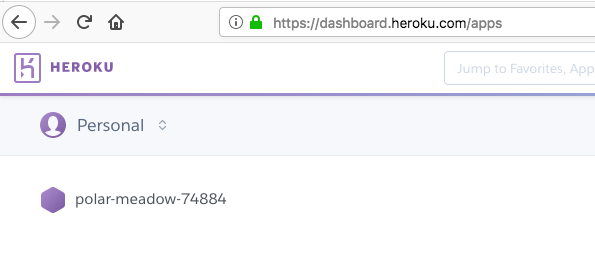
If we want to check that we’ve created the app successfully, we can simply go to the Heroku dashboard on https://dashboard.heroku.com/apps:
MySQL database creation with ClearDB
Now we have to setup the server database. In this case, we’ll use a Heroku plugin called ClearDB.
Basically it’ll allow us to create a MySQL database and provide us the tools to work with it.
We go to our Heroku dashboard, and on Resources tab look for “ClearDB” in the Add-ons section.
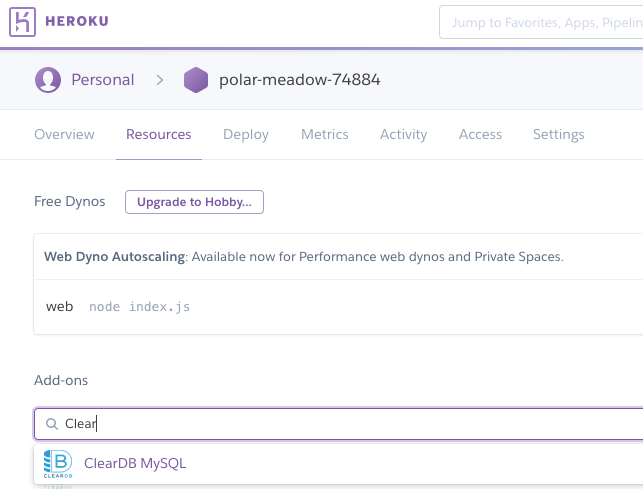
We select ClearDB MySQL and this will create a database as we see on the following image:
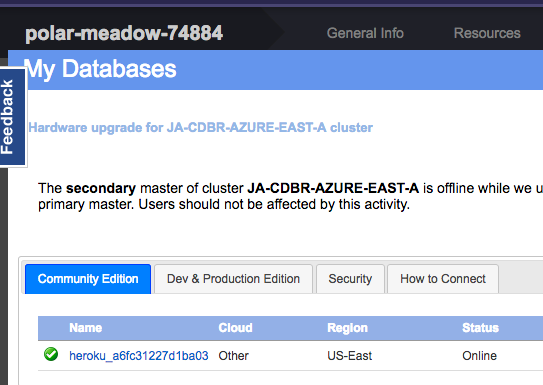
Our new database name will be heroku_a6fc31227d1ba03
The next steps will be to find the needed credentials to visualize the database with SequelPro. We have to open the Heroku dashboard and go to the Settings tab:
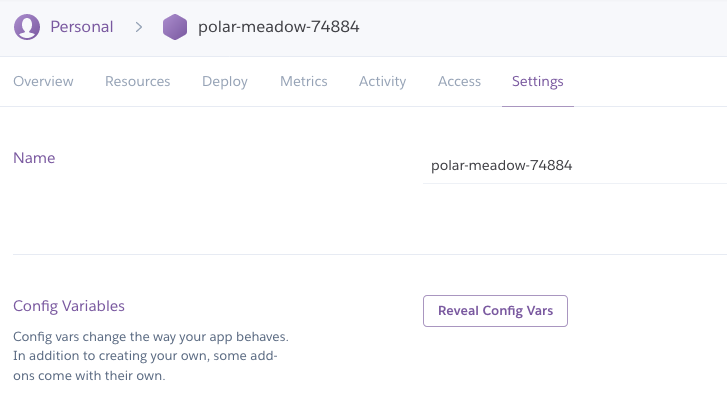
We tap on “Reveal Config Vars” and for the variable CLEARDB_DATABASE_URL it will show us something like the following:
mysql://b772d56506fae3:[db73ae24@us-cdbr-iron-east-05.cleardb.net](mailto:db73ae24@us-cdbr-iron-east-05.cleardb.net)/heroku_a6fc31227d1ba03?reconnect=true
From where we can obtain the following credentials:
User: From // until :. In this case b772d56506fae3.
Password: From : until @. In this case db73ae24.
Host: From @ until /. In this case us-cdbr-iron-east-05.cleardb.net.
Database: From / until ?. In this case, the same we saw before:
heroku_a6fc31227d1ba03.
Important: If we got a Heroku free account, it ‘s possible that it ask us to validate our account entering a credit card data. There is no risk on submit that and there is not any cost on the used services in this post. It’s just a identity validation for the customer.
Migrating our local database with SequelPro
Now with the credentials for our server database, we open SequelPro and enter them here:
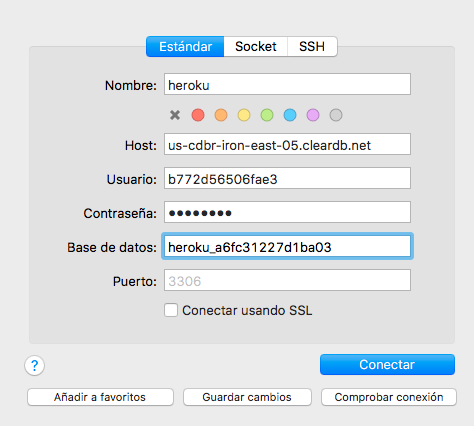
If we want we can click on “Check connection” to see if everything is ok. We connect and it’ll open the database, totally empty for now.
As we want to upload our local data, we have to migrate them to the server database using a SQL script.
To do that, we open our local database on SequelPro (as we did previously) and go to File -> Export. It will open the following window:
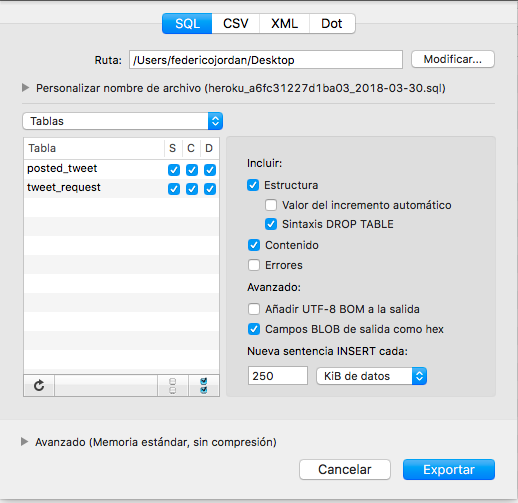
We save the generated file, open the window with the server database, and go to File -> Import, where we select the file with the SQL script.
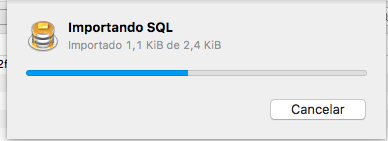
We wait it to finish the process and after that we can see our data on the Heroku database.
Using the connection with the server database
Now we’re going to test our app locally, but with the server database.
We open our .env file, where we had saved the local database data and we
replace these values by the server ones:
Basically, we replace the values for DB_HOST, DB_USERNAME, DB_PASSWORD
and DB_NAME by the ones seen previously.
To test if we have a successful connection to the database, we open terminal
app and run node server.js
We can check with Postman doing a request to
http://localhost:3000/tweetRequest/4 , being 4 a valid id number for the
“tweet_request” table.

This show us that our app is ready to be deployed to Heroku.
Deploying our app to Heroku
The last step is to upload the app code to the Heroku git repo. But before all
that, we have to tell Heroku which is the command that needs to be executed to
run our application. It can be done with a Procfile.
What is a Procfile? It’s a text file which will have the information about which is the command to be run to init our application. We can create it with the following:
In this line we are defining a dyno called web which will execute the
command node server.js . It’s very simple, just a line.
With all of that, it’s just a matter of uploading our app to Heroku. We can do:
git add .

git commit -m "deploy to Heroku"

git push heroku master
And with this, we’re going to have our code uploaded and the app will be run
with the command node server.js. We can see the web service URL running the
command heroku open. In my case the url will be:
https://polar-meadow-74884.herokuapp.com/tweetRequest/4
We can test that we’ve done everything well with Postman:
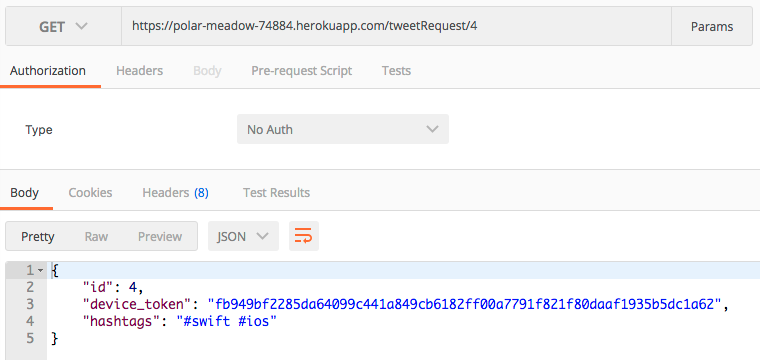
We have our app uploaded!
Note: If you want to consume the uploaded API from the iOS app that we code before, you’ll have to change the embedded URL in the app by the Heroku one.
What to do if our server crashes
It’s possible that we do an invalid request sometime, like requesting a tweetRequest that is not on the database. For those cases, our application should have the logic to deliver the proper error to the client, which is not covered by these posts.
If that’s the case, or any other, we have to have the possibility to restore our server in case there is any error. To do that, we can to the Heroku dashboard, and on the right, where it’s “More”, we tap on “Restart all dynos”
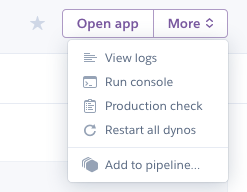
By this way, it will run the command node server.js, which is the command
that we specified on our Procfile for the web dyno.
We can also see why our application stopped working going to “View logs”. This will show us the last logs and we would see what was the error there.
Conclusions
With the base of a Node.js app and a local MySQL database, we saw how to upload it to a cloud service as Heroku.
We learned how to configure the account, the essential commands, migrate our local database to the server and test the server database and the deployed app.
Thanks for reading!
More info about how to start working with Heroku here
Sources:
- http://selimsalihovic.github.io/2016-02-07-using-mysql-on-heroku/
- https://devcenter.heroku.com/articles/getting-started-with-nodejs#deploy-the-app
- https://devcenter.heroku.com/articles/how-heroku-works
- https://es.wikipedia.org/wiki/Heroku
This article is also available on Medium