Using Schemes and .xcconfig Files to Organize Build Deliveries in iOS

There are many times that we need to organize our mobile deliveries. This means, the build that we use to publish our app in App Store, or the build that we use every day to build our app locally, or to distribute internally in our company are not the same.
Here we’ll see a way to organize a bit better our app deliveries and start organizing it in internal configurations that make sense in our everyday work.
About Build Schemes
From Apple documents:
When you build, run, test, profile, or archive part of your project, Xcode uses the selected build scheme to determine what to do. A build scheme contains a list of targets to build, and any configuration and environment details that affect the selected action. For example, when you build and run an app, the scheme tells Xcode what launch arguments to pass to the app. Xcode provides default schemes for most targets, and you can customize those schemes or create new ones as needed.A build scheme is basically the configuration which relates a target and any configuration that we may need for that target. This includes environment variables, configuration files, or anything that can make the build customizable.
For example, we can have the three following schemes:
- A production scheme, the one that our users can download at App Store
- A staging scheme, or internal testing one. Also can be called Beta
- A development scheme, which is used locally by engineers
This separation of concerns in terms of builds configuration can help us to customize the experience of our app. With such types of schemes, we can for example:
- Change app icon
- Use a different base URL for our internal API
- Configure third party SDK in their respective environments
- Add internal development tools that can help QA or Devs teams
- Avoid sending information to third parties, for example, we wouldn’t need to send crashes information to Firebase if we are compiling the app in local. That would add not real data to our crashes dashboard.
 |
|---|
| Example of Chrome icon with Beta configuration |
Schemes versus Targets
There is anoter important component in our build system structure, and it is the Target. A target is basically the app that we are building, the product that we aim to build. Which means, all the source code that is needed to be compiled and finally create the binary. A target uses a scheme to build a product. We can summarize the differences as the following:
A Target specifies a product to build and contains the instructions for building the product from a set of files in a project or workspace.
An Xcode scheme defines a collection of targets to build, a configuration to use when building, and a collection of tests to execute.
As we can use targets to differentiate configuration, that is not the purpose of them. We’ll end up making more complicated the build system and the developer experience using the project. A target builds a product, and a scheme contains the configuration of how to build it.
Xcode configuration files
A key central piece of using schemes is to use Xcode Configuration files. These are the ones with .xcconfig extension.
Basically we can define custom values for our desired build configuration, that we can use later to build our target. An example:
We can create many .xcconfig files, and reference within them each other, to avoid repeating common values between configurations. The following section will explain this concept better.
Example project
For our example project, we’ll have the following:
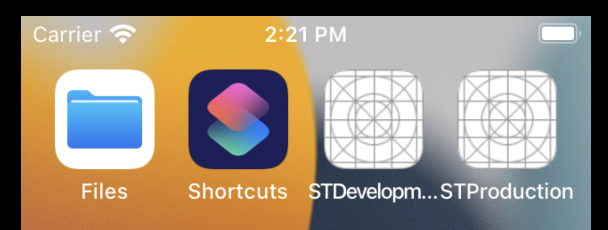
- 1 target called
schemes-test - 2 schemes called
STDevelopmentandSTProduction - 3 .xcconfig files:
Common.xcconfig,Development.xcconfigandProduction.xcconfig
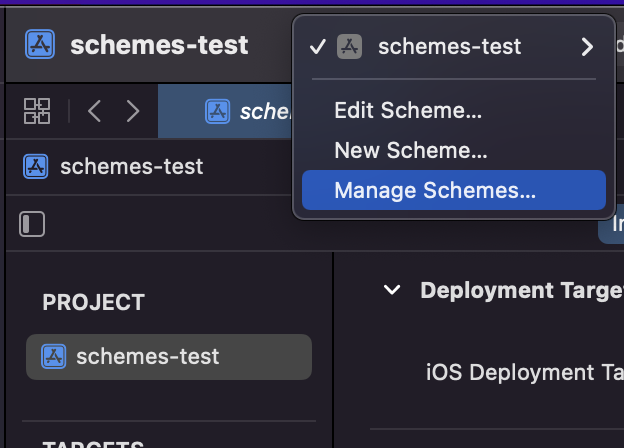
Since the target is already created when we have a new project, we’ll proceed to create the schemes. We’ll tap in the “Manage Schemes…” option in the top menu next to the project name:
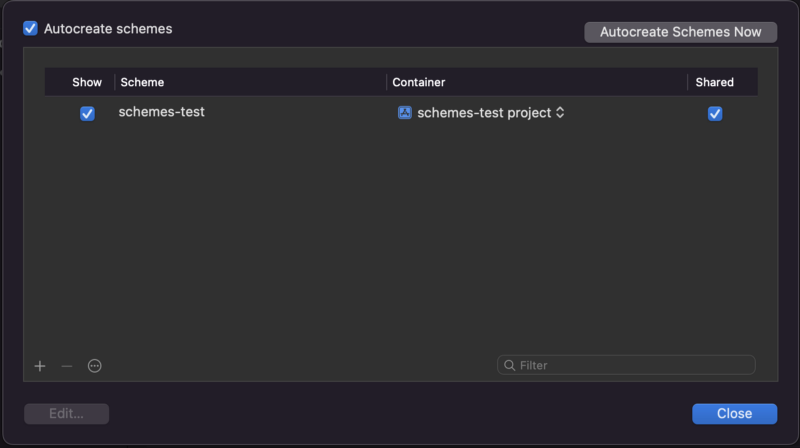
Then, in the Schemes list view, we’ll tap on the + button to create a new scheme
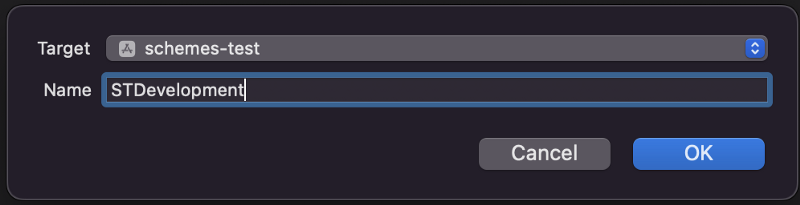
We’ll create a new scheme with the name STDevelopment :
The same for STProduction
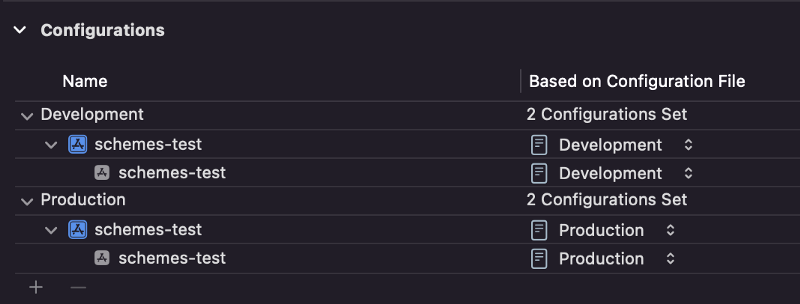
At this point we should have the following schemes in our list:
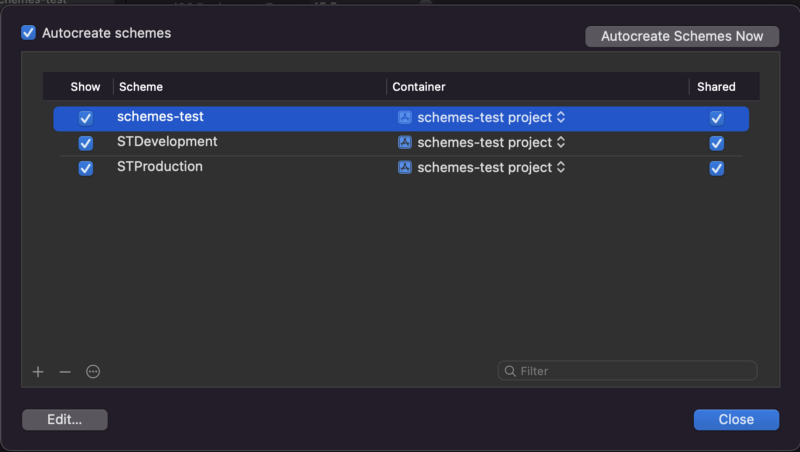
It’s safe to delete the autogenerated schemes-test scheme, since we won’t use it.
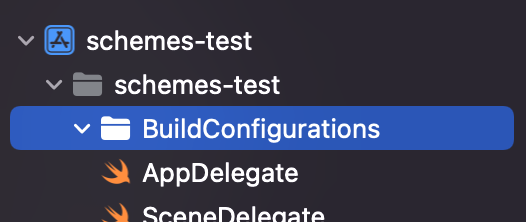
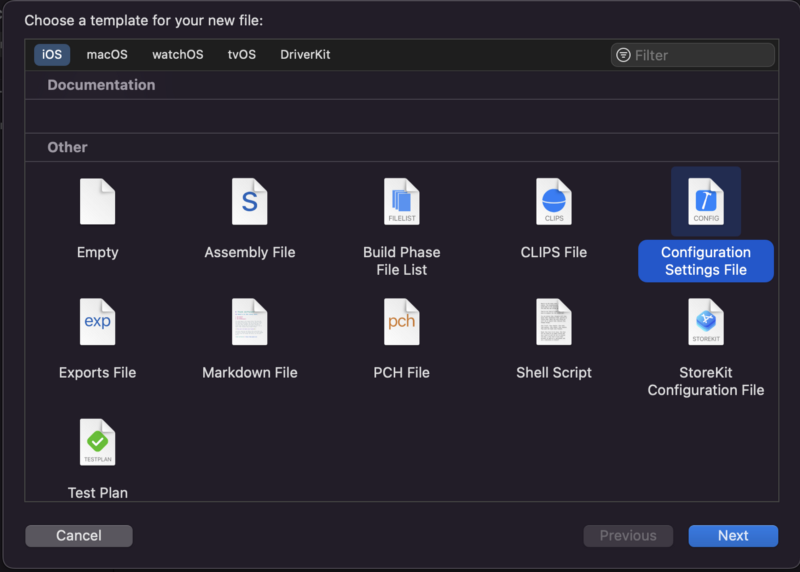
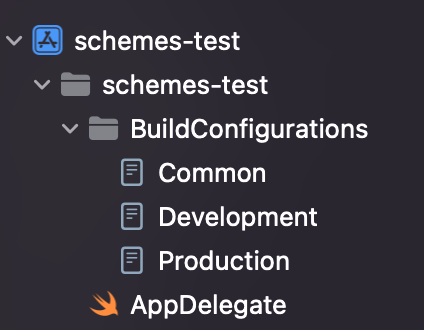
Now, we’ll proceed to create the .xcconfig files. We’ll need to create a BuildConfigurations folder in our project root.
Then, we’ll create a new file with the type of Configuration Settings File
We’ll call this file Common . Then we do the same steps for new files Development and Production . At this point, we should have these files in our project:
In Common file we’ll enter the following code
In Development we’ll enter the following:
And the next lines for Production:
We define the following values in our .xcconfig files:
PRODUCT_BUNDLE_IDENTIFIER: The bundle identifier of our schemeMARKETING_VERSION: The version number for the buildCURRENT_PROJECT_VERSION: The build numberBUNDLE_DISPLAY_NAME: The visible name of the app at screen
As you can imagine, with the #include keyword we can include files. In our case, the values for MARKETING_VERSION and CURRENT_PROJECT_VERSION should remain the same between configurations. But the value for PRODUCT_BUNDLE_IDENTIFIER is different, since we want to have different apps for both environments. Same for BUNDLE_DISPLAY_NAME , which is the visible name of the app
Now the next step is to associate these files with the configurations. To do that, we go to the project settings:
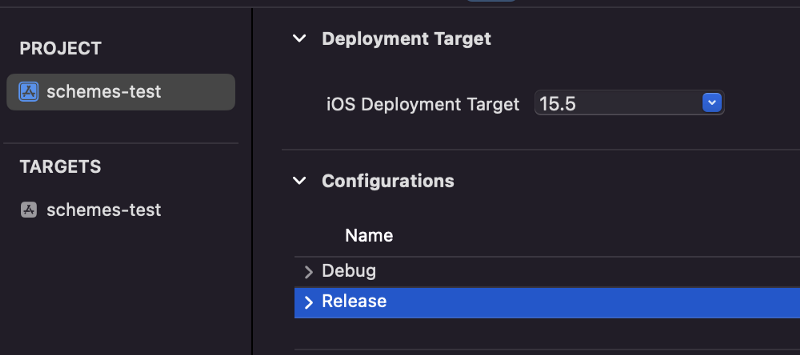
Here we’ll replace the Debug and Release names by Development and Production, just to match our files names. Also we add the corresponding xcconfig files to each configuration:
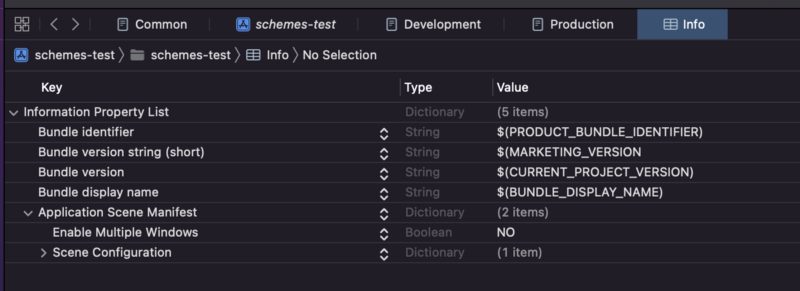
To be able to use these values, we need to go to our Info.plist file, where we will add the following properties, with each matching variable:
- Bundle identifier with
PRODUCT_BUNDLE_IDENTIFIER - Bundle version string (short) with
MARKETING_VERSION - Bundle version with
CURRENT_PROJECT_VERSION - Bundle display name with
BUNDLE_DISPLAY_NAME
So, we’ll end with something like this:
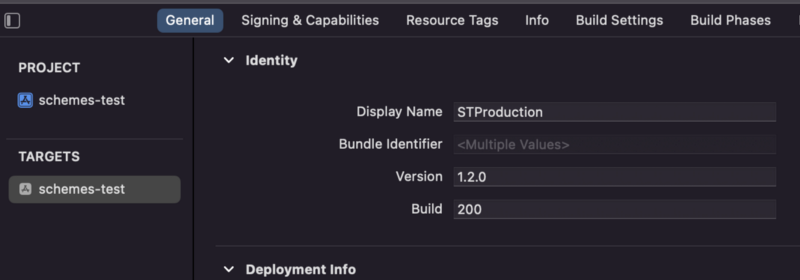
The same can be done if we tap on our target settings and set the $(…) for each variable in their respective field:
As a last step, we need to link each scheme with each configuration, so we tap on Edit Scheme at the top bar:
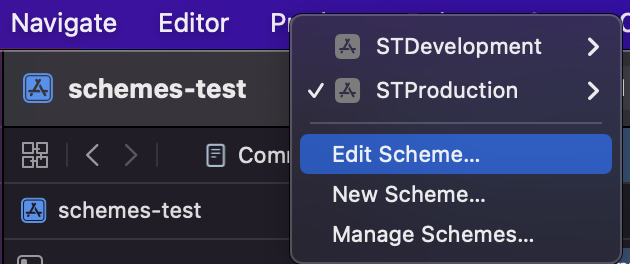
We’ll link each scheme with the related configuration:


And that’s it! If we run our schemes in the simulator, we’ll see that we have two different apps:
Checking schemes in the code
We can include code regarding the scheme in our binary if we want. For this particular case, we can use the following for Development.xcconfig :
SWIFT_ACTIVE_COMPILATION_CONDITIONS = DEBUG
And this other one for Production.xcconfig :
SWIFT_ACTIVE_COMPILATION_CONDITIONS = RELEASE
So, in our code we can have the following:
This is very useful to present hidden menus, or developer/QA utilities to help debugging.
Matching version and build number between app and extensions
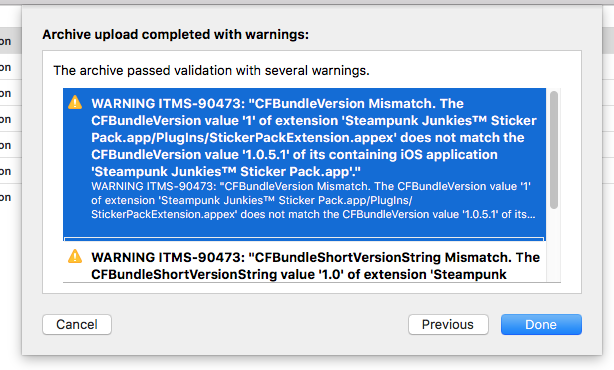
It’s important to make the same numbers changes for the test target, so both main and test target have the same version and build numbers. Same case for App Extensions. We need to keep the same Version and Build number between main target and App Extensions, otherwise Apple will warn us when we upload the build into App Store Connect. The message will be similar to the next one (will be received by email also)
About adding tokens or API keys
We can add API keys/tokens in .xcconfig files, so then we can define them in plist files and access them like this:

let bundleId = Bundle.main.infoDictionary?["APIKey"] as? String
However, this is not a secure solution. We should aim to get such sensitive data in another way, because it’s not secure to have them commited in our git repository. If we use a CI to build and distribute our app, many CI providers have the option to set Secrets (Bitrise, for instance) and then inject those secrets in the project with a solution like cocoapods-keys. I’ll talk about how to do it in a next post.
Conclusion
We saw how to define different configurations for our project. It’s really useful to be organized in such a manner that we can use a build for local development and another for production. That capability will enable us to add proper testing tools, define third parties environments better, or just organize our code in a more efficient way.
You can look at the complete source here.
Thanks for reading!